In the first post of this series, Organizing with Lightroom, we looked at organizing folders, using Lightroom (or possibly the system’s file manager) to organize folders, and then in Lightroom organizing your images into Collection Sets and Collections. In this post we will look more closely at our Collection Sets and Collections, and how we can use them in Lightroom to organize and control portions or the workflow.
With respect to Collections, Lightroom has two types that we will consider. In this post we will be looking at standard Collections, which will work best for the purposes we have in mind. The other type is Smart Collections. Briefly, Smart Collections allow some attribute of the photo (meta keyword, star rating, etc.) to trigger the image being automatically added to the Smart Collection. If we used Smart Collections for this post’s purposes, we would (or could) end up with photos from different shoots, location, and of different subjects, being combined into a Smart Collection. We’ll talk about Smart Collections in a future post, but if you’re interested, Scott Kelby’s Lightroom Killer Tips recently solicited tips on Smart Collections (and I’m pleased that a tip I suggested was selected among the top five tips).
For our purposes, we will assume that you have located your photo files in a folder with an appropriate naming structure, and are ready to import them. Some may object that they want to import the files into Lightroom and have Lightroom move them to an appropriate folder at the time of import. Lightroom certainly can do that, but in my workflow, putting the files in the folders I want, before importing, seems to work better for me.
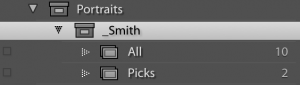 Before importing, I create a new Collection Set. Let’s assume a friend has asked me to take Senior Portraits of his soon-to-be graduating High School Senior. I already have a Collection Set called “Portraits.” I will right-click on the name of the Portraits Collection Set, and add a new Collection Set beneath it, which I will name Senior Portraits (if you want to keep things separated, you’ll want to do this; if you won’t have that many portrait sessions, you can skip this step). Next, I’ll create another Collection Set below Senior Portraits, named for the subject (perhaps “Smith, Mary,” or “Mary Smith” - some photographers, especially professionals, may add the date of the shoot to that name), and then below the Collection Set for the person, two Collections. The first Collection will be called All. I’ll use that to put all the photos from the shoot in that one. The second Collection will be called Picks.
Though I have seen other people do something similar, I learned this habit from Scott Kelby, and have found it simple and incredibly helpful. By putting all my photos in the “All” collection, I can easily review them and select the ones I will want to process (or show to the client, as the case may be). These will be the ones to go in the “Picks” collection. Here’s how that works:
Typically the “All” collection will include multiple versions of the same pose or scene, but you will ordinarly not want to end up with multiples of the same shot. The easy way to choose the one you like best is, while in Lightroom’s Library module, select each image that is fundamentally the same (if they are sequential, click the first image, then hold Shift and click the last one to select all in between; if they are not sequential, Cmd-Click on Mac (Ctrl-Click on Windows) to select each one), and press the “N” on the keyboard. You’ll see all the selected images on the screen.
- Select the weakest photo and click the “X” in the lower right. That image is removed from the grouping, and the photos resize and rearrange.
- Repeat until you have the one you want to edit, be sure it is selected, and press “P” (for Pick).
- Press “G” (for Grid) to get back to the Library view.
Repeat this process for every grouping of similar images. Looking at the Library (Grid) view, you’ll now have the best image of every group of similar shots marked with a white flag (picked). If there are any unpicked images that you really want to process, select them one at a time and press “P” to “pick” them.
Next, go to the top of the Library module, labelled “Library Filter” and click “Attribute”, then click the white flag. That will cause the Library to show only the white-flagged photos. Select them all (Cmd-A on Mac, Ctrl-A on Windows). In the Collections list on the left side, right-click the “Picks” collection. From the fly-out menu, select “Add Selected Photos to this Collection” which will add them immediately, or select “Set As Target Collection”. If you choose the latter, then press “B” to add the selected photos to the target collection.
Now you can process the photos in the “Picks” collection, without the distraction of multiple similar images. Of course, you can always go back to check the images left in the “All” collection and add them to the “Picks” if appropriate. If you export the finished images (or proofs, if that is more appropriate, depending on the workflow and process you use) to show them to the subject/client, you can create another collection, perhaps called “Client Picks” where you can put the ones the client wants to have delivered.